You know that moment when a hike goes longer than planned? The sun dips below the horizon, and suddenly a chill crawls into your bones. It’s a vulnerable feeling, right?
Out there, the ability to create fire isn’t just handy. It’s key for warmth, cooking, purifying water, and even signaling for help. Without fire, the wilderness can feel pretty unforgiving.
Doesn’t it make sense to learn how to start one? In this article, I’ll strip away the fluff and guide you through fire starting techniques that work. We’ll dive into modern tools and timeless methods, all tested by years of real wilderness experience.
You’re getting a full, trustworthy resource here. By the end, you’ll be prepared. Fundamentals to advanced (ready) for whatever the wild throws your way.
The Fire Triangle: Flame’s Simple Secret
Ever tried starting a fire and failed? It’s not about memorizing steps. It’s about understanding the Fire Triangle.
This is the real backbone of fire starting techniques. Picture a three-legged stool. Take one leg away, and it falls.
The same goes for fire: heat, fuel, and oxygen. Remove one, and you’re left with nothing but frustration.
Heat is your ignition source. A match, lighter, or even a flint. It’s what gets everything going.
Then there’s fuel. It starts with tinder (think dry grass or cotton balls), moves to kindling (pencil-sized twigs), and finally, fuel wood (like wrist-sized branches). Each has a role.
Don’t forget oxygen. Proper airflow fans the flames. Without it, your fire won’t breathe.
Each is key.
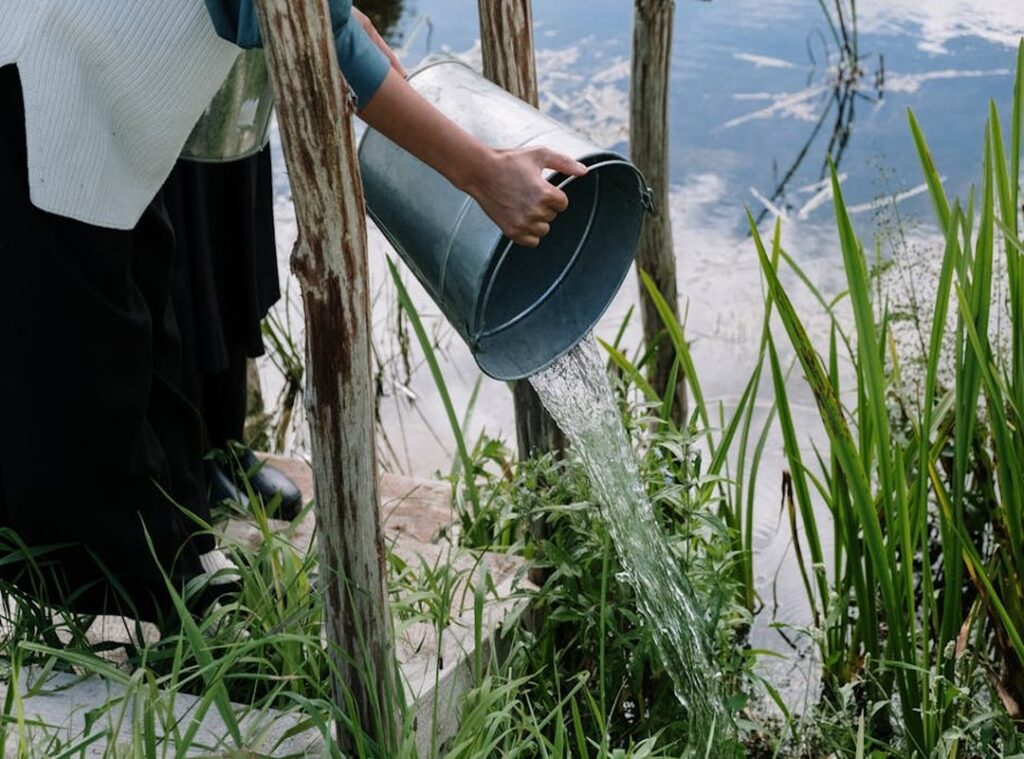
Knowing these basics, you can troubleshoot any fire-starting failure. And while you’re out there, don’t forget to learn how to source water in the wilderness. It’s just as key.
Modern Methods: Your Go-To Fire Starters
When you’re out in the wild, fire starting techniques aren’t just a convenience. They’re a lifeline. So let’s talk about a tool that should be in every survival kit: the Ferrocerium (Ferro) Rod.
Unlike old-school flint and steel, this thing sparks even when wet. It’s reliable in the cold too. Scrape it with a metal striker and voilà.
A shower of hot sparks. You don’t need to be a survivalist to appreciate that.
Now, onto the simple lighter. Easy to use, right? But here’s the rub: it can run out of fuel or fail when wet.
Ever tried lighting one in the cold? Not fun. Still, for sheer convenience, a Bic lighter can’t be beat.
It’s just not something to rely on alone.
Let’s talk matches. Stormproof or waterproof ones are a game-changer. They stay lit in wind and rain, unlike those flimsy regular ones.
Grab a quality brand and store them in a waterproof container. Why chance it?
A quick pro tip: redundancy is key. Carry at least two, preferably three of these methods. When you’re out there, you don’t want to be caught without a way to start a fire. (Trust me, that’s a bad day.)
Finally, remember this: fire starting isn’t just about one tool. It’s about having options. So, what’s in your daypack?
Are you prepared for whatever nature throws your way?
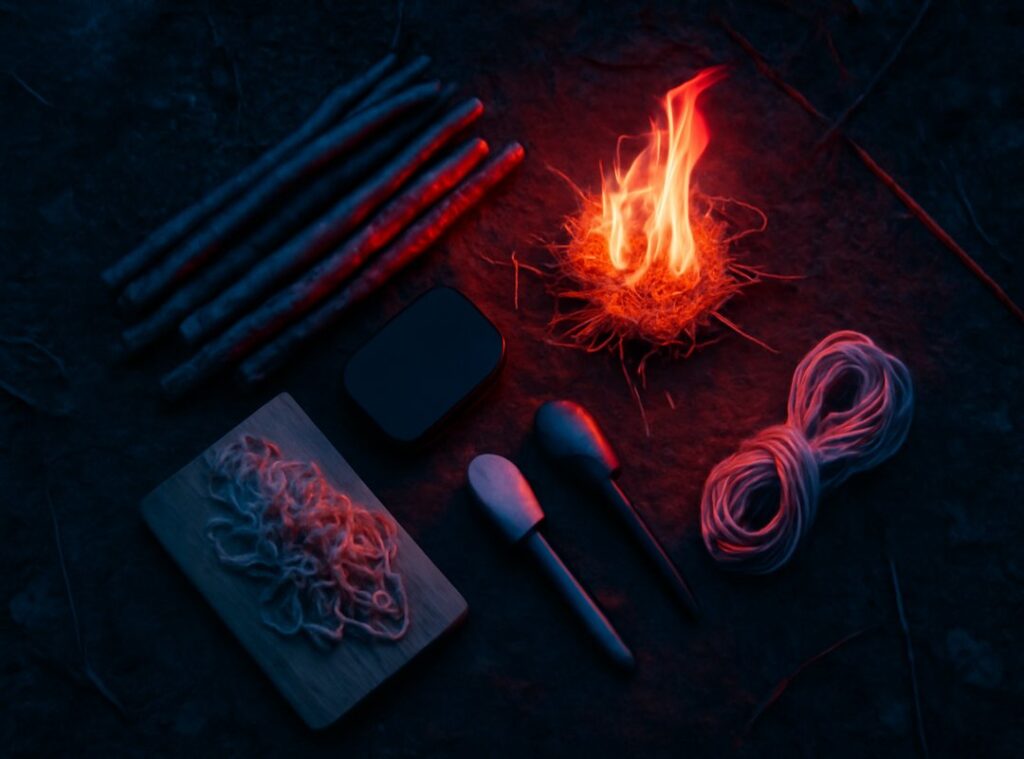
Primitive Friction Methods: The Ultimate Survival Skill
Ever tried starting a fire without matches or a lighter? Let me tell you, it’s not just about rubbing sticks together. It’s about self-reliance and understanding the primitive friction methods.
The Bow Drill is where you should start. Why? Because it’s the most achievable for beginners.
Carve the spindle to fit snugly into the socket. Then, cut a V-notch into the hearth board. This is where the magic happens.
Here’s what you need: the hearth board, spindle, handhold (socket), and bow. The hearth board and spindle should be from non-resinous, medium-soft wood. You don’t want to end up with a sticky mess.
Using the bow, apply pressure with the handhold and start a sawing motion. Keep going until you see a coal forming. That coal is like gold.
It’s fragile, but it’s the start of your fire. Transfer it carefully into a tinder bundle. Think of the bundle as a bird’s nest made of dry grass.
Gently blow on it until you see flames. And there you go. A fire without any modern tools.
Now, if you want a real challenge, try the Hand Drill. It’s harder and demands more skill. The materials need to be top-notch.
But once you’ve mastered the Bow Drill, you’ll appreciate the difficulty of the Hand Drill even more.
Friction fire isn’t just about survival. It’s about connecting with the past. It’s like finding food foraging wild.
Both require patience and knowledge. Fire starting techniques are survival skills everyone should know. So next time you’re out there, give it a shot.
Fire from the Sun: Using Light and Lenses
Ever tried to start a fire with nothing but sunlight? It’s wild. You take a convex lens, focus sunlight into a single, hot point, and bam.

Fire. The go-to tool? A good old magnifying glass.
It’s about angling that lens just right to create the smallest, brightest spot on your tinder. Sounds simple? It is, but it’s also tricky.
But what if you don’t have a magnifying glass? Get creative. Try polishing the bottom of a soda can with chocolate or toothpaste (yes, they actually work).
Or shape a chunk of ice into a lens. You can even use a clear plastic bag filled with water. These aren’t just cool tricks; they’re survival hacks.
There’s a catch, though. This method only works with clear, direct sunlight. So forget it if it’s cloudy or you’re deep in the woods.
This makes it unreliable in many situations. Interested in other fire starting techniques? Check out these ways catching spark history fire making methods.
It’s fascinating how people have been sparking fires throughout history.
Fire Starting in Bad Weather: A Key Skill
Lighting a fire when the weather’s against you feels like an uphill battle, right? Wet, windy, or freezing conditions challenge even the most seasoned adventurers. But knowing a few fire starting techniques can make you the hero of your own story.
First, finding dry tinder is key. Have you ever peeled back the bark of a birch tree? Often, you’ll find dry material even in a storm.
Dead standing wood is another goldmine. Look at the base of pine trees too.
Processing like this keeps your fire dreams alive. Speaking of which, don’t forget to prep your site. Lay a platform of sticks to avoid damp ground.
Got wet wood? Shave off those soggy outer layers with a knife. The wood inside is usually dry.
A windbreak can be a lifesaver, using rocks, a sturdy log, or even your pack.
Pro tip: always carry a commercial fire starter like wax-impregnated cotton or fatwood. These are lifesavers when nature throws every roadblock your way. Fire’s not just warmth; it’s survival.
Next time you’re out, remember these steps. It might just save your day. Got other fire tales or tips?
I’d love to hear them.
Skills for Survival: Practice Makes Perfect
Getting stuck in the wild without knowing how to start a fire? That’s a dangerous game. We covered everything: modern and primitive techniques.
But here’s the kicker (reading) isn’t enough. Real confidence? Comes from getting your hands dirty.
So here’s what you do. Pick two methods from this guide. One modern and one primitive.
Practice them in a safe place this weekend. Your future self will thank you. Need proof?
Our readers swear by these fire starting techniques. So, don’t wait. Challenge yourself.
Start a fire. Secure your safety. Because in the wilderness, knowledge is more than power (it’s) survival.
 Survival Content Specialist
Jodi Milleraycansy writes the kind of camp setup hacks content that people actually send to each other. Not because it's flashy or controversial, but because it's the sort of thing where you read it and immediately think of three people who need to see it. Jodi has a talent for identifying the questions that a lot of people have but haven't quite figured out how to articulate yet — and then answering them properly.
They covers a lot of ground: Camp Setup Hacks, Eawodiz Trail Navigation Techniques, Hidden Gems, and plenty of adjacent territory that doesn't always get treated with the same seriousness. The consistency across all of it is a certain kind of respect for the reader. Jodi doesn't assume people are stupid, and they doesn't assume they know everything either. They writes for someone who is genuinely trying to figure something out — because that's usually who's actually reading. That assumption shapes everything from how they structures an explanation to how much background they includes before getting to the point.
Beyond the practical stuff, there's something in Jodi's writing that reflects a real investment in the subject — not performed enthusiasm, but the kind of sustained interest that produces insight over time. They has been paying attention to camp setup hacks long enough that they notices things a more casual observer would miss. That depth shows up in the work in ways that are hard to fake.
Survival Content Specialist
Jodi Milleraycansy writes the kind of camp setup hacks content that people actually send to each other. Not because it's flashy or controversial, but because it's the sort of thing where you read it and immediately think of three people who need to see it. Jodi has a talent for identifying the questions that a lot of people have but haven't quite figured out how to articulate yet — and then answering them properly.
They covers a lot of ground: Camp Setup Hacks, Eawodiz Trail Navigation Techniques, Hidden Gems, and plenty of adjacent territory that doesn't always get treated with the same seriousness. The consistency across all of it is a certain kind of respect for the reader. Jodi doesn't assume people are stupid, and they doesn't assume they know everything either. They writes for someone who is genuinely trying to figure something out — because that's usually who's actually reading. That assumption shapes everything from how they structures an explanation to how much background they includes before getting to the point.
Beyond the practical stuff, there's something in Jodi's writing that reflects a real investment in the subject — not performed enthusiasm, but the kind of sustained interest that produces insight over time. They has been paying attention to camp setup hacks long enough that they notices things a more casual observer would miss. That depth shows up in the work in ways that are hard to fake.